Online consultations

Preparing for your online consultation

Hi, and a warm welcome! Thank you for your interest in an Online Consultation or a Tongue & Ear Analysis.

This holistic approach looks at your symptoms and discomfort together with a close examination of your tongue and ears and, depending on the photos, possibly your palms and posture. The tongue and ear analysis is part of the 2-hour Online Consultation and the Recorded Tongue & Ear Analysis; the 1-hour consultation is a general discussion based on your herbal form.

Wersja polska →

Step 1

What you need

Recorded Tongue & Ear Analysis

Sent by email. I record a personal video with what I see and my recommendations. Please send me:

  • photos of your tongue and ears (see below)
  • the herbal consultation form, if you like: it helps me give you more precise recommendations

£100

Book now →

Please email the form (and photos, for a 2-hour consultation or a tongue and ear analysis) to ela@zestacupuncture.co.uk at least 48 hours before your first consultation, and 24 hours before each follow-up.

Step 2

Your photos

High-quality photos are essential, because I pay close attention to a range of visual details: subtle variations in colour and structure, the presence of moles, and any patches or coating on your tongue and ears. Shadows make this analysis less effective.

Guidance

  1. Take all photos in the morning, if possible. Always with the flash on.
  2. It is best if someone else takes them for you.
  3. Send two or more photos of each view.
  4. Let’s get the clearest possible photos on the first try: please check your images before sending, to make sure they are free of shadows. This helps me assess them accurately and avoids delays.

Tongue

Tongue photos

Photos must be taken with the flash on. Best done in the morning, on an empty stomach. Please don’t take them in a room or bathroom with blue or any other coloured light: use plain, white light only, so the true colour of your tongue shows.

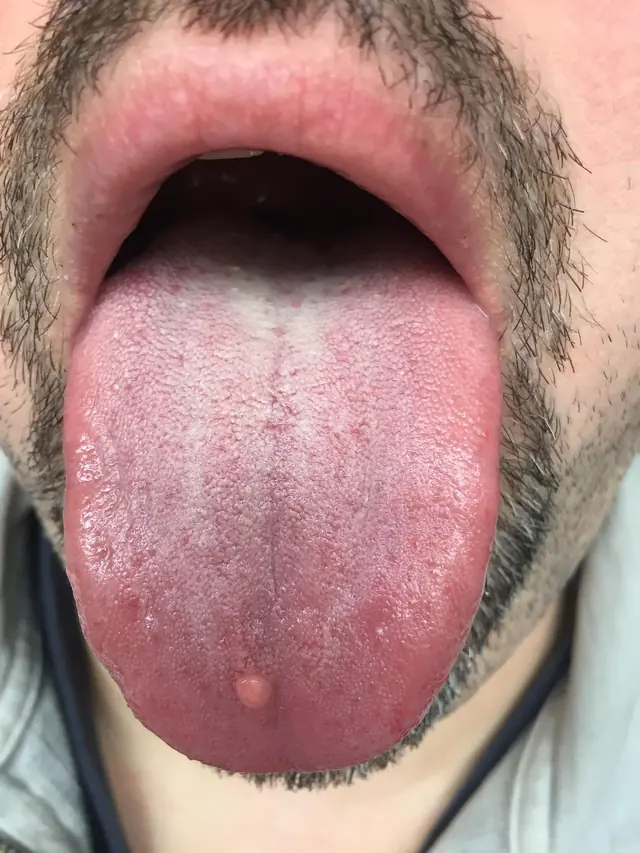
Example photo: a tongue stuck out fully, lit evenly with a flash.
1. TongueStick out your whole tongue and take a photo.
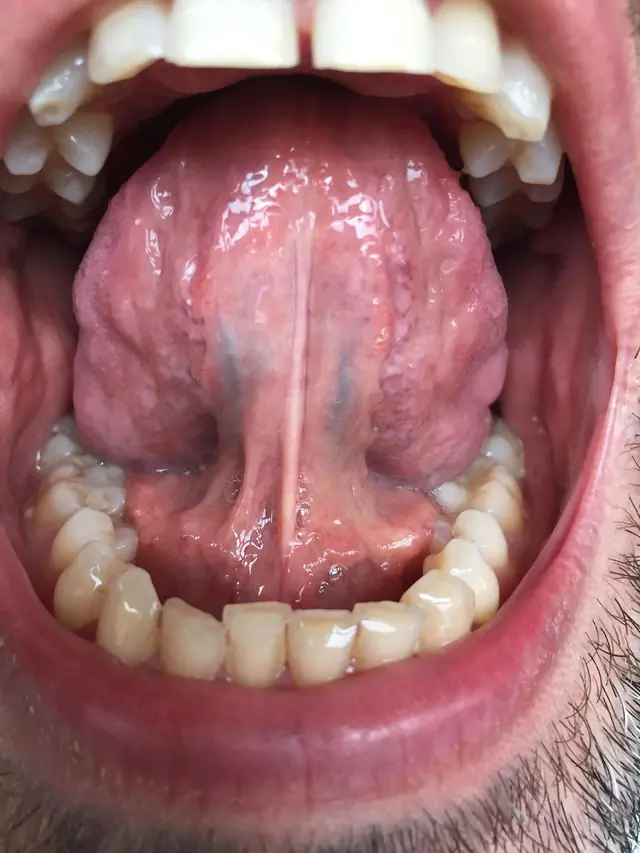
Example photo: the underside of the tongue, with the tongue tip raised to the upper gum ridge.
2. Under the tongueOpen your mouth, place your tongue on the upper gum ridge and take a picture. Make sure to capture the bottom of the tongue, behind the lower teeth.
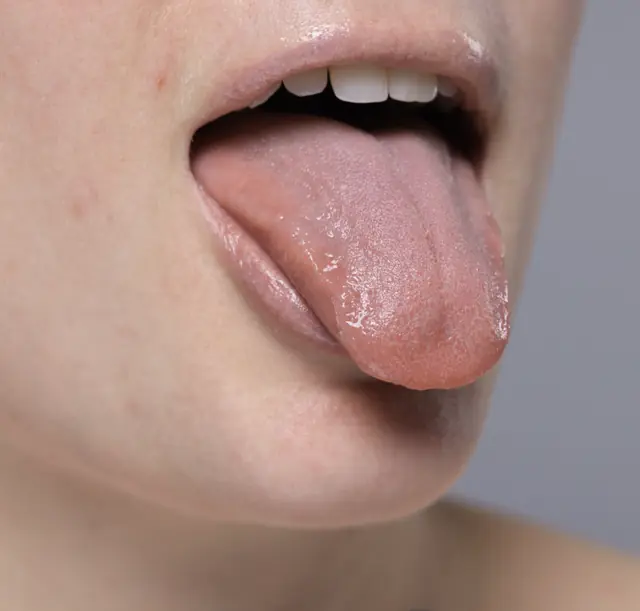
Example photo: the side of a tongue, stuck out at an angle.
3. Side of the tongueTake a picture of the side of your tongue.
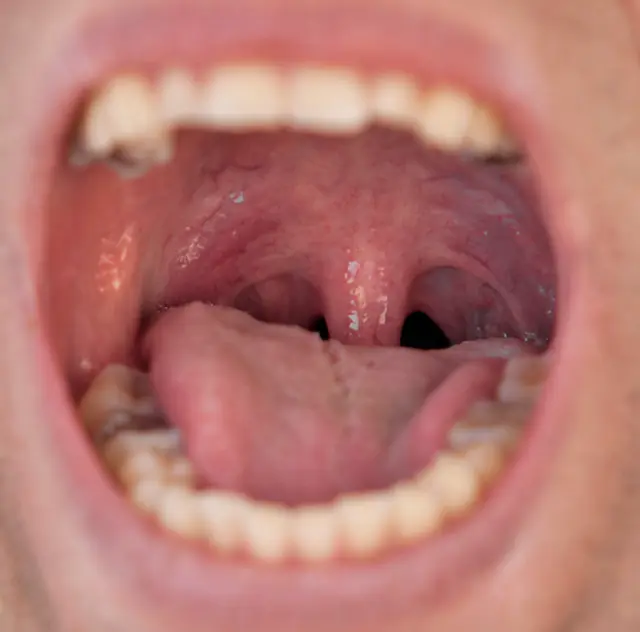
Example photo: an open mouth showing the back of the tongue and the uvula.
4. UvulaTake a photo of the back of the tongue, near the tonsils, so that the uvula is visible.

Additional notes

  • Photos should be clear and well lit.
  • Photos should be in focus, not blurry.
  • Photos should be high resolution.
  • Save the photos in JPEG format.

Watch the short video: how to take these photos →

Ears & palms

Ear and palm photos

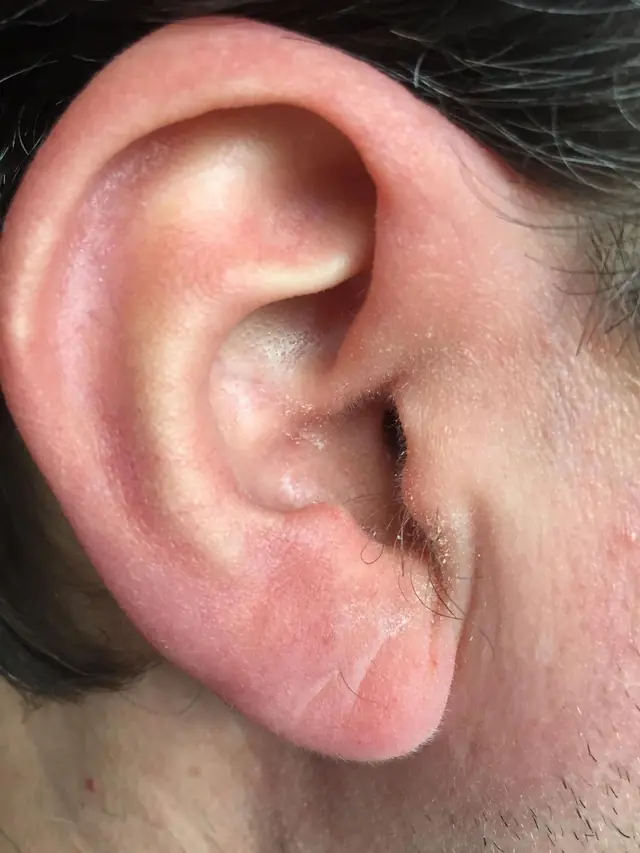
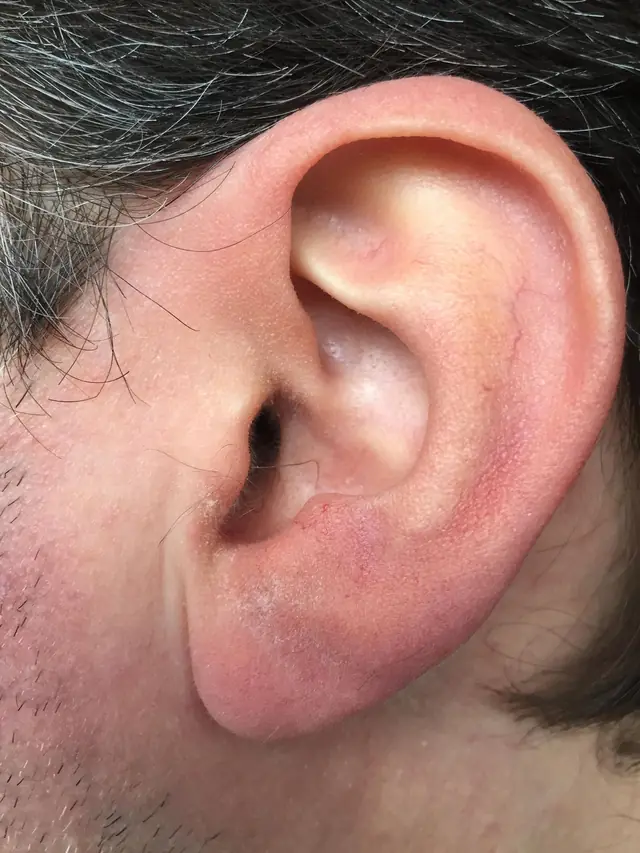
The same guidance as above applies. Please use the flash while taking the photos. The ears mustn’t have shadows: everything should be clearly visible.

Example photo: a right ear, photographed close up with a flash, no shadows.
5. Right earPhotograph each ear separately, close up and without shadows.
Example photo: a left ear, photographed close up with a flash, no shadows.
6. Left earEach ear reflects the body in its own way, so I need both.
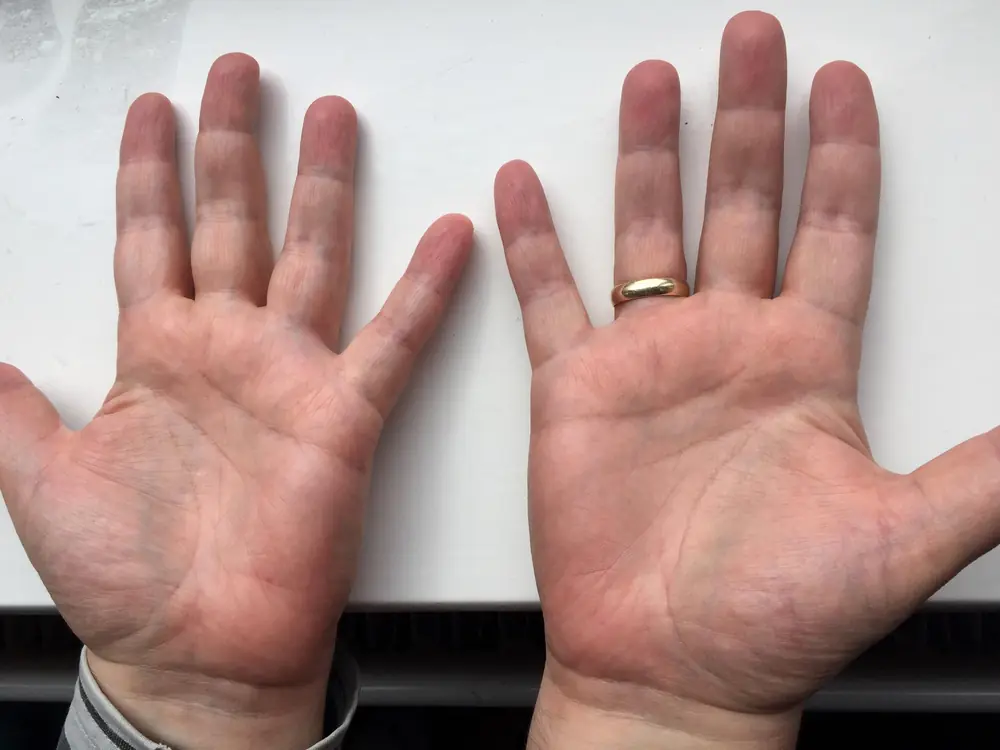
Example photo: the insides of both palms, side by side, including a little of the wrists.
7. Palms, insideOnly if I ask you to provide them. Ideally include a few centimetres (about 2 inches) above the wrists.

Ready to send?

Please email your form, and your photos (JPEG) if you’ve booked a 2-hour consultation or a tongue and ear analysis, to ela@zestacupuncture.co.uk. Online care doesn’t replace medical care: if your symptoms are new, severe or getting worse, please see your GP.

Book nowWhatsAppPrices